
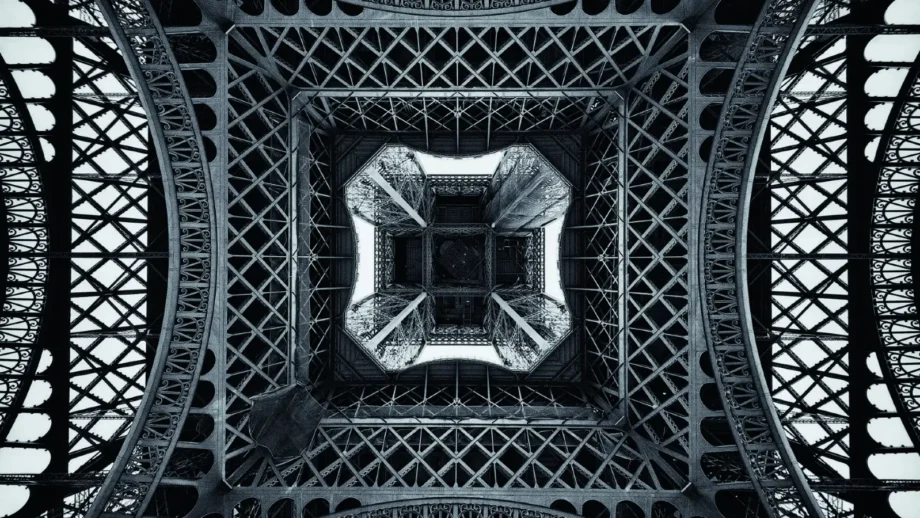
Your passport and boarding card are safely stowed, the bags are checked and weighed, and most importantly, the camera is charged up and ready — it is time to fly! The proliferation of cheap city breaks around Europe — and indeed further afield — provides unique opportunities for photography and enthusiastic photographers to stretch their creative legs.
We will look at the techniques, essential equipment, and different approaches you can use to get the most out of a city break, whether using a DSLR camera, compact camera, or mobile phone. Photographing in a city presents opportunities to practice and extend several photographic skill sets, from architecture to candid portraiture. Opening your eyes to interesting compositions and novel techniques while travelling is a great exercise that will improve your holiday pictures and yourself as a photographer.
Stepping Out
When travelling, there are a few photographic considerations to bear in mind, and these will help you choose what gear to take with you:
- What style of shots do you primarily want to capture?
- How important is flexibility in your setup?
- How much weight do you mind carrying?
Of these three questions, the first and most decisive is usually how much weight you are prepared to carry all day. If you are lucky enough to have a selection of camera sizes to pick from, your phone or a compact will no doubt be the most convenient, but your DSLR will provide the best image quality and the best results if you know how to use it well in varying conditions.
If you think carrying a DSLR with several lenses all day will be physically taxing, then compromising on image quality may be the most appropriate choice. Either way, planning ahead is a sensible precaution and taking into account your daily agenda, with stops for R&R amongst seeing all the sites, would allow a heavier load to be carried.
The current range of mirrorless, interchangeable lens cameras, sometimes referred to as Compact System Cameras or CSCs (such as the Fuji X-Pros, Panasonic G7, and Olympus OM-D E-M10 Mark II), are perhaps the ideal ‘city’ choices on the market. They combine excellent image quality from either Micro Four Thirds or APS-C/DX sized sensors (both considerably physically larger than any normal point-and-shoot) and an option to change lenses from fixed focal length, fast (large aperture) prime lenses to convenient do-everything zooms.
Find Your Frame
This brings us neatly to the other two questions you should consider when packing your camera bag — what styles do you want to accomplish, and how flexible do you think you will need to be?
Given the huge range of potential photo-ops in a new city, these are seemingly tough questions to answer. However, the only sensible answers of ‘all the styles’ and ‘as flexible as possible’ are not necessarily the best approaches to take, as this will lead to a camera bag full of lenses, a tripod, a flash gun, indecision when presented with said photo-op, and certainly backache from carrying around too much gear all day.
The most practical approach to city photography is to carry the minimum gear you can and make the most of it rather than worry about missed opportunities. For instance, two zoom lenses covering wide-to-normal (18-55mm for APS-C cameras, 24-70mm for FF) and a medium telephoto (55-200mm APS-C, 70-300mm on FF) or three fixed primes (24mm, 50mm and 85mm for FF or APS-C) will capture 99% of what you see without excess weight.
Whilst it may not be to all tastes, a single fast prime is, in reality, all you need for a city break — a 35mm f/1.8 for APS-C/DX or 50mm f/1.8 for FF. The consistency of framing you achieve from using a single non-zooming lens will generally lead to a natural tendency to produce strong compositions. After a little experience using a lens like this, you often find you can ‘see’ your shot before you have even lifted the camera to your eye-line.
Inherently, there are compromises involved with different lenses, such as ‘get-it-all-in’ wide-angle shots that you simply cannot achieve. However, restrictions like this often lead to greater creativity — if you are using a mobile phone, perhaps you can take a detail shot instead of a panorama, highlighting the elements that really draw you into a particular subject.
A fast prime will also give you maximum control over the depth of field, allowing you to blur backgrounds selectively, and the wide aperture will maximise the amount of light reaching the sensor for low-light photography. The control this gives you is ideal for producing memorable portraiture (allowing you to separate your subject from the background) and food/interior shots where a shallow depth of field and a carefully chosen point of focus will raise your shot from a typical ‘Instagram-of-my-lunch’ shot, to something to salivate over.

As a top tip, investigate your camera’s manual to see if it offers an auto-ISO function. This will set the camera to raise and lower the sensitivity of the sensor depending on the level of light available and the f-stop you use. High ISO settings are very handy when shooting hand-held in low light situations, whilst low ISOs give the ‘cleanest’ (i.e. free from digital noise) images. Whilst very high ISO (above 3200) will introduce visible grain to your shots, a sharp shot of a street scene at night without the need for a tripod is much preferable to either a blurry shot from too slow a shutter speed or, for that matter, the inconvenience of lugging a tripod around all day.
Seeing The Sights
The real challenge of photographing a city break comes from the sheer variety of subjects. From churches, civic architecture, parks and gardens to delicious local delicacies and street scenes, having your eyes open and being ready to capture the moment is critical to getting great shots.
Taking ideas you see online can be a great starting point for ideas on how to frame certain landmarks — take the Eiffel Tower, for example. The opening shot was inspired — or rather provoked — by the repetitive nature of a lot of shots I saw before visiting Paris. Rather than ape the common approach (from a distance, trying to get it all in with a wide-angle lens, often without any real sense of composition), I wanted to find a different angle to shoot such an iconic landmark, and as such before I even set foot on Champ de Mars and walked to the tower, I knew I wanted to try something different.
Be brave and try an unusual, stylised or abstract approach to your city break photography — especially when dealing with famous landmarks — and you will end up with photos you can be proud of, or even print and hang on the wall.
Consciously choosing to do something different from the ‘guidebook’ style is also a big step along the creative road, signposted by a universally helpful piece of advice: before you press the shutter button, ask yourself why you are taking a particular photograph.
Taking a moment to consider each shot is the most worthwhile exercise any photographer can undertake, as refining the idea behind your image will help each frame contain more substance, impact, and beauty. Breaking down a few common examples, you could consider the following:
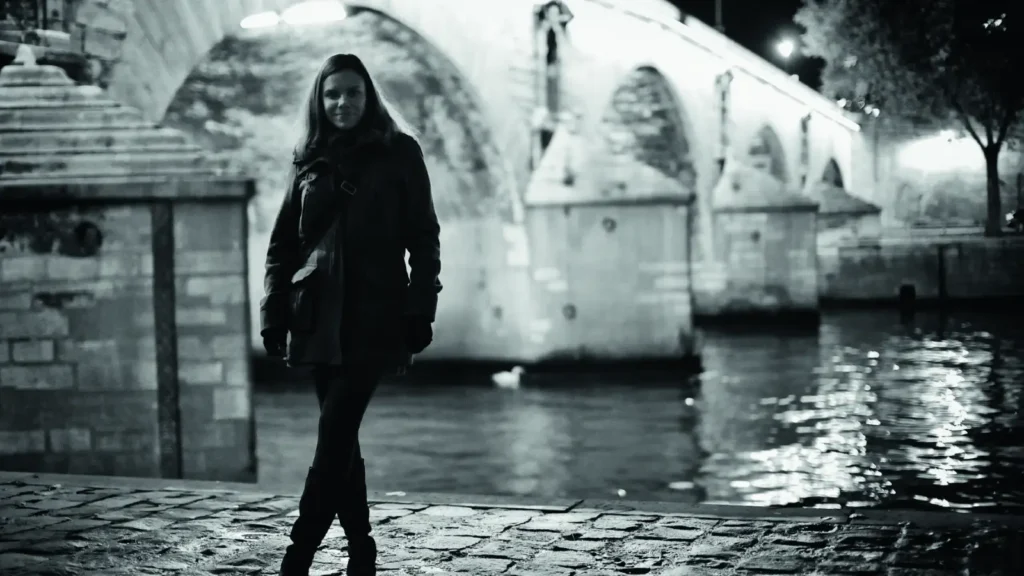
When shooting a portrait, is it purely the person in the frame you want to capture or that person in the broader context of where they are? If it is a pure portrait, consider getting closer and taking a few frames in rapid succession (using continuous release mode) whilst talking to your subject to bring out different facial expressions. If it is the latter, and the environment is as important as the person, then take a moment to consider where you would like them to stand, how you would like to compose the shot around them and how far back you might want to stand to get the impact of the environs you want.
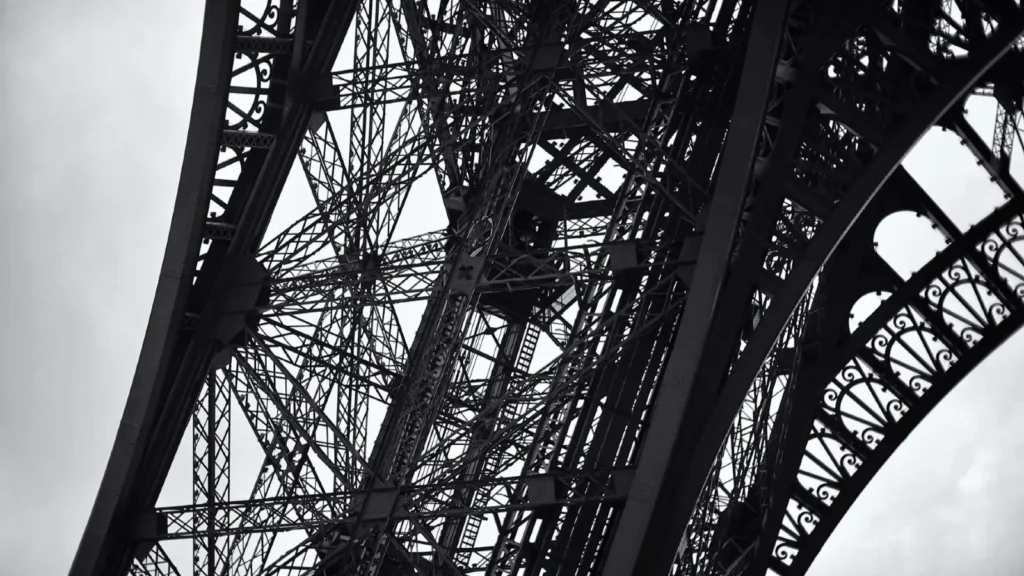
With architecture, is it the detail or the overall impact of a building you want to capture, or even how it sits in its environment? If it’s detail, get close and frame just what catches your eye. For overall impact, take the time to find lines of symmetry — interesting angles and how to structure your shot best whilst taking care to compose accurately will add interest. If it is the environment, consider how something as fundamental as the time of day you take your shot might influence the atmosphere.
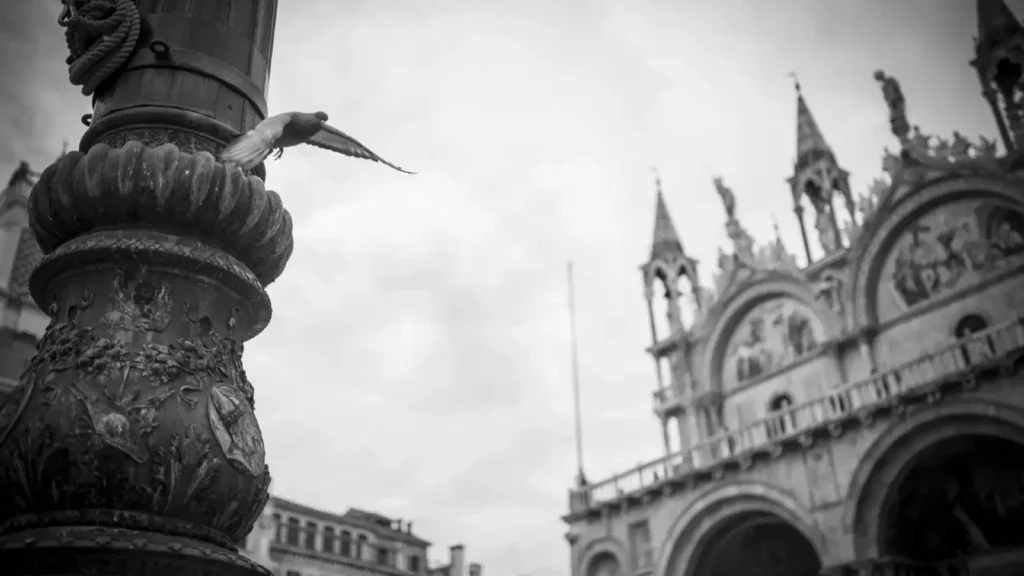
With street photography, refine if it’s the location or the goings-on that you want to capture. If it is the location, try some differing techniques to highlight this. Find a fixed viewpoint or landmark that ties the scene to its location, or try using a longer shutter speed to blur pedestrian/vehicle movement. Likewise, if it’s the activities in a place that interest you, get close and try to capture as much action as you can in a single shot.
Light, Camera, Action!
Appreciating the light around you is the final element in producing great images. The traditional advice of shooting with the light (with the sun or light source behind you) is as applicable to city photography as it is to landscape. However, intense side light, or even shooting into the light, can give spectacular results — if you put a little thought into how this will affect the exposure.
When shooting in tricky light, such as into the sun, consider using exposure compensation to balance the brightness of the shot. Adding some negative exposure compensation will reduce the brightness of the shot and maintain detail in highlights such as sunsets, with the compromise of reducing darker elements of the image to shadow or black silhouettes. If this is done consciously, it can produce some very striking results — try -0.7 e/v as a starting point for sunset shots.
Dialling in some positive compensation will blow out highlights to pure white but can be used to great creative effect with portraiture or architectural photography.
As a final tip, visiting landmarks at different times of day can produce some dramatically different results. Catching a well-lit building just around sunset can lead to very strong, colourful images. So, if seeing a particular place is a highlight of your agenda, it is worth timing the visit to make the most of the light.
When you next visit a new city, try to bear these tips in mind, and they will help you to make interesting, vivid, and memorable images to treasure.

- Driven: Rolls-Royce Ghost Series II — Luxury evolved - 6 May 2025
- Driven by vision: The Aston Martin Lagonda Series 2 revisited - 22 April 2025
- Ogio Introduces Limited-Edition Agave Ahora Golf Bag Collection - 25 May 2024